Showing posts with label Halloween. Show all posts

Thursday, October 1, 2020

Mr. & Mrs. Frankenstein

Hello crafty friends Cyndy G here from My Scrap Chick.  Welcome to the first day of October.  Today is a very exciting day as it marks the start of a three month guest designer term for Trendy Twine!  It will be a fun filled holiday season with lots of inspiration.  Today we are having a group post with both the regular design team AND the guest design team to get the creativity flowing for the Halloween season. Be sure to hop over to the Trendy Twine blog to see the projects from all of the Trendy Twine Gals!  To start things off I have a fun Halloween project using the Mini Clear Take Out Boxes. It features one of our twists from the sampler of the month, Spooktacular Sampler.
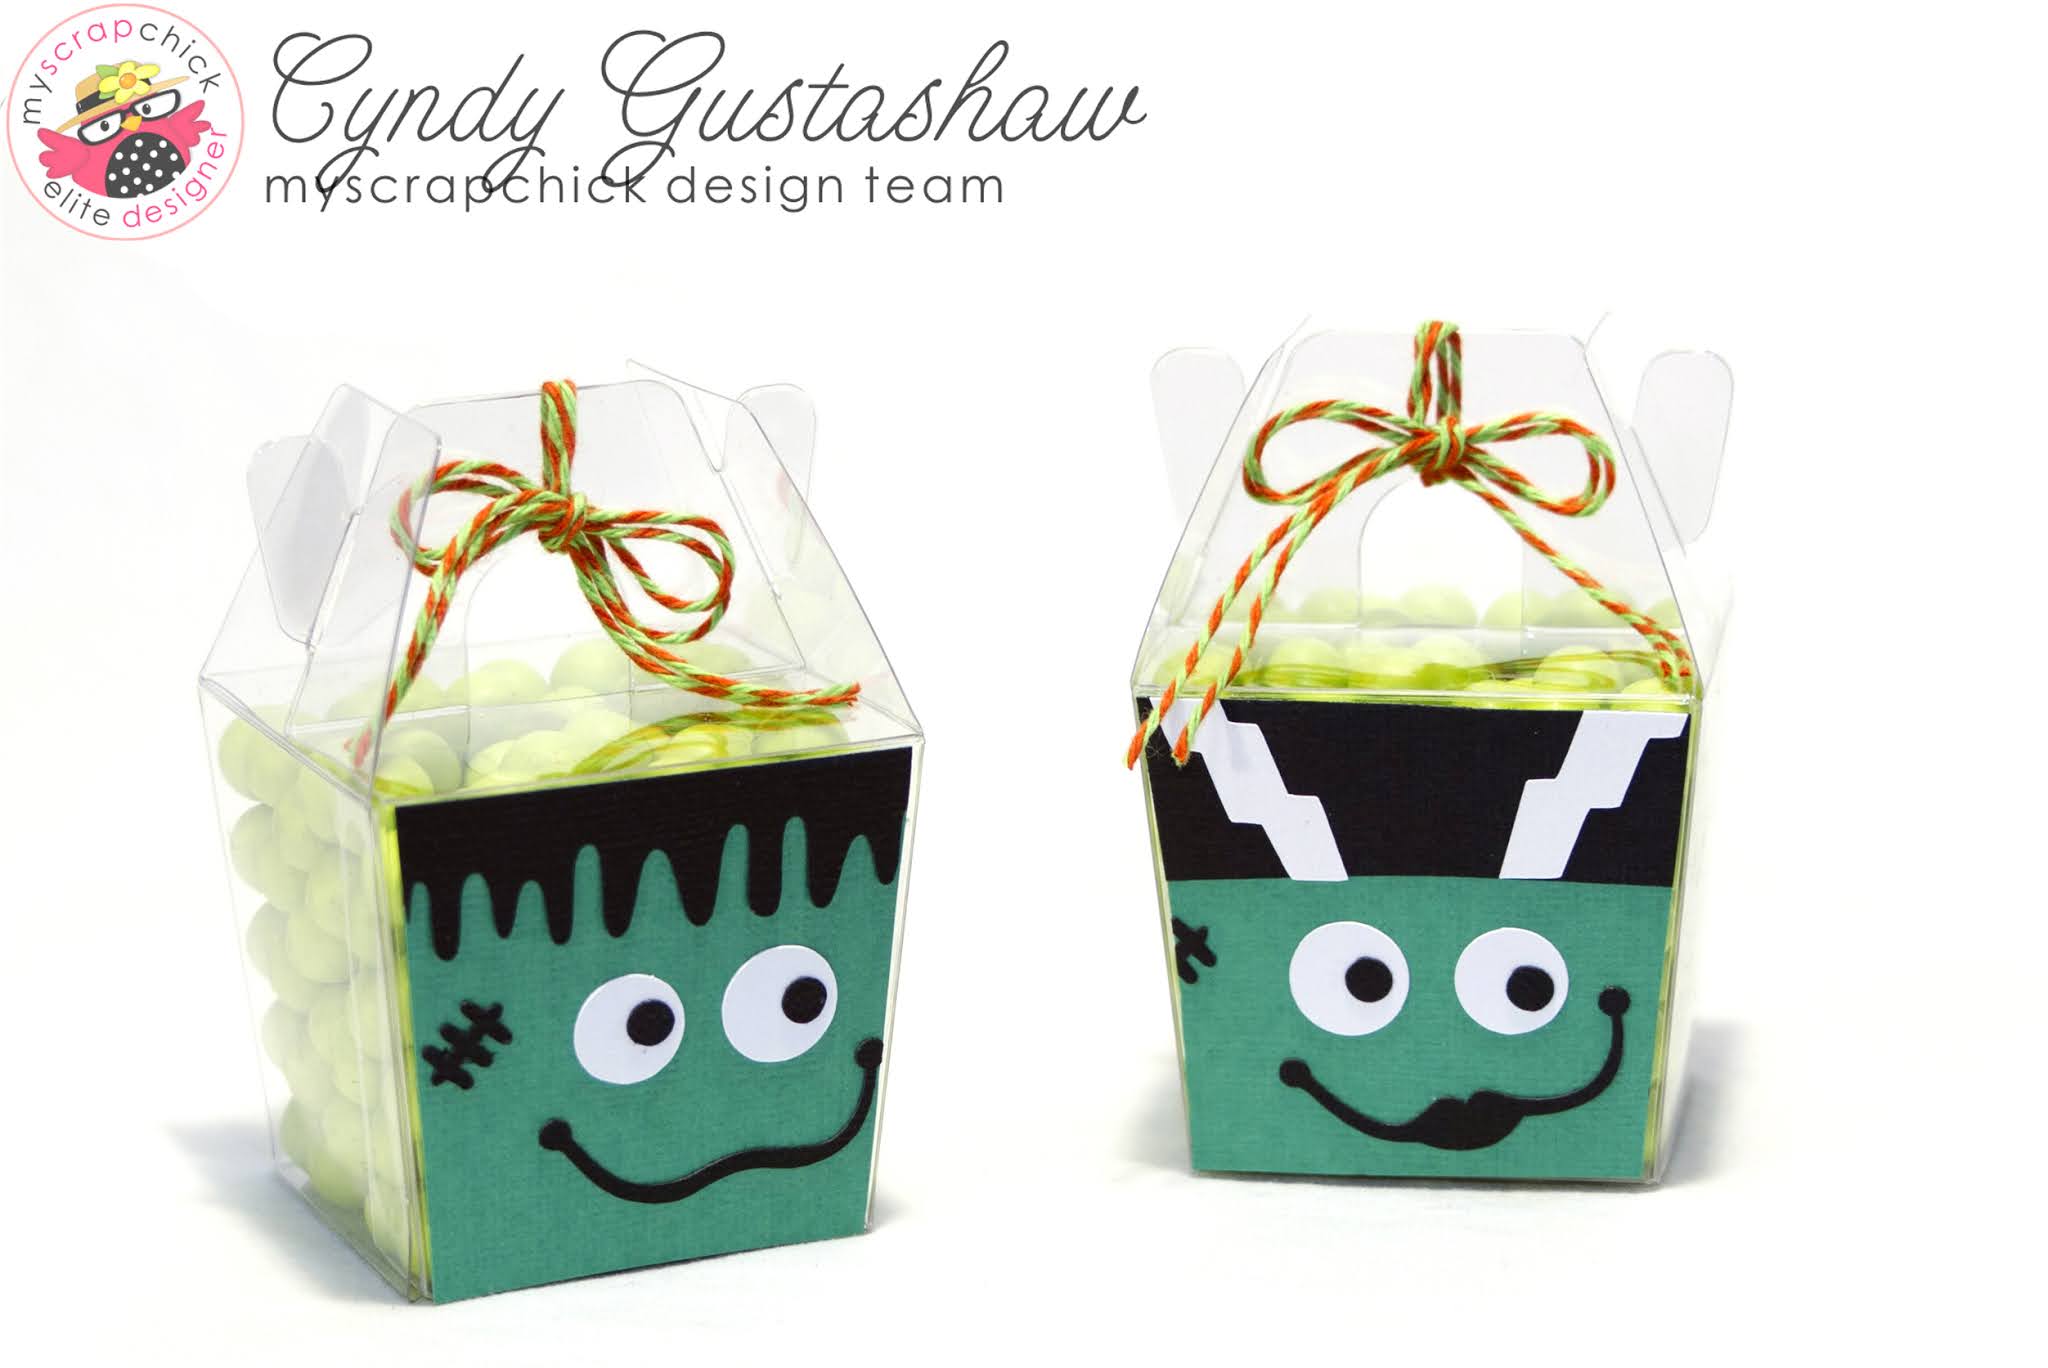

I knew I wanted to make a Frankenstein and Bride out of the Mini Take Out Boxes.  I used the faces from the CG Franken Box and Mrs. Frank Box, then traced the shaped of the box and cut them down to fit.  I finished off the take out boxes with Orange Limeade Trendy Twine

Here's what I used from Annie's Paper Boutique:


Here's what I used from My Scrap Chick:

Here is a look at this month's spooky Trendy Twine sampler!
If you are new to Trendy Twine, you will want to check out these fun places:
Shop for Trendy Twine HERE
Follow Trendy Twine on Facebook

Thank you for stopping by and don't forget to browse all the other wonderful files we offer at 
My Scrap Chick there's lots of cute projects to explore.

If you make any of the files from My Scrap Chick we would love for you to share them with us on our facebook fan page:   My Scrap Chick Maker's Group.

Do what inspires you,
Cyndy G


Thursday, October 12, 2017

Haunted Treats ~ with Cyndy G

Hello today I am sharing a project I made using files from My Scrap Chick.  I combined two different files to make this cute candy dish.  I used the Haunted House from Haunted House Easel Card and the Trick or Treat Snack Box.

Candy dish with haunted house pictured on it

I sized the Haunted House so that it was as wide as the snack box and then I welded the shapes together.  TIP:  To make sure all the pieces of the Haunted House are sized correctly put them all on the computer mat and group them before I re-sizing.

Thank you for stopping by today.


Do what inspires you,
Cyndy G.

Tuesday, October 10, 2017

Pumpkins in the Pumpkin patch ~ with Cyndy G

Hello today I am sharing with you some cute and super easy to assemble pumpkins from SVG Attic.  These are from the JGW Pumpkin Grin kit.  I just love how these came out.

pumpkin treat boxes sitting on a bale of hay

These can be used for fall decor or you can fill them with treats and give them out.  They were so quick and easy to put together you could make several in no time at all.  My favorite kind of project.

pumpkin treat box sitting on a bale of hay

I used several different patterned papers.  I think these would cute made with some kraft paper too.  The possibilities are limitless.


Thank you for stopping by.

New to SVG Attic?  Check out these awesome places!


Do what inspires you,
Cyndy G.

Friday, August 25, 2017

Witchie Woman ~ with Cyndy G

Hello crafty friends.  Today I am sharing a project from SVG Attic - JGW 3D Witch.  This project takes a some time a patience to put together but the finished project is well worth the effort!


Isn't she adorable.  Her skirt panels are stitched together with some embroidery floss.  The paper is some K&Company that I had and the accent panels are Graphic 45, Halloween in Wonderland.


Her hair is made out of Trendy Twine - Limeade.  I made her hair according to the directions except I used Mod Podge instead of starch and I loosened the curls.  To make her bangs I ran three strands of twine across the front of the hat.  I glued the hair around the inside edge of the hat rather than her head then attached the hat.  


I added a bat to the center of her bow.  I also decided to not add the wings to my witch.  

Thank you for stopping by.

New to SVG Attic?  Check out these awesome places!


Do what inspires you,
Cyndy G.


Friday, August 11, 2017

Mourners Hat ~ with Cyndy G

Hello today I am sharing one of my favorite files from SVG Attic - the Mourner's Hat from JGW Raven Quest.  I just love how this file comes together.  It's not to hard and the result is stunning.

3d Paper Mourner's hat

I used some Mod Podge on my hat to help protect it and I love the result!  

Close up of hat showing flower and bow

It took a little bit of work to get the flower looking like I wanted but I am please with the end result.  I painted it with some colored glitter glue.  I think I will be using more of this stuff!

Thank you for stopping by.

New to SVG Attic?  Check out these awesome places!


Do what inspires you,
Cyndy G.

Monday, August 7, 2017

Halloween Puzzle ~ with Cyndy G.

I have had this puzzle on my Pinterest board for a long time now and thought it was time to give it a try.  The original design was done by Thienly for SVG Cuts.  You can find all the instructions for making it here.   I decided to use files by Doodlebug that I purchased from the Silhouette Design Store or on Lori Whitlock's site here, they are so cute and worked really well on this project.

Hunchback image on puzzle

Aren't they just adorable!

ghost puzzle

My daughter told me I needed to make a lot of these and sell them because everyone will want one.  She is the sweetest.

Frankenstein puzzle

The great thing about these is they are 6x6 so you can use some of your 6x6 paper pads to make these.

Bat puzzle

Each block is a 2" square.  To make the puzzle picture, you first assemble the image on a 6x6 sheet of paper and then cut it into 2" squares.  After you have cut the squares you attach one section to each of the cubes you have made.

Mad scientist puzzle

It does take a little time to put all the pieces together but there is nothing too difficult about this project.
When you are finished seal your work with a little mod podge.

Bride of frankenstein puzzle

Thank you for stopping by.

Do what inspires you,
Cyndy G.

Friday, August 4, 2017

Love Potion ~ with Cyndy G

Hello today I am sharing a project from My Scrap Chick - the potions bottle from Midnight Manor Trio.  This bottle is so quick and easy to put together.


I used some Graphic 45 paper out of my stash, Steampunk Spells.  I also used a little Trendy Twine and ribbon I had from Hobby Lobby.  I just love this file.

Thank you for stopping by.

Do what inspires you,
Cyndy G.


Tuesday, August 1, 2017

Monster Fingers ~ with Cyndy G

I have been busy making sure I am ready for the Holidays this year.  Every year I plan to make things and always run out of time.  So this year I am trying to get ahead of the game.  I made some Halloween treat boxes by Jamie Cripps.  I picked them up in the Silhouette Store.

Halloween Treat boxes - Mummy fingers, Werewolf fingers, Witch fingers and skeleton fingers

These were very easy to put together and they are so cute.  Each finger is a box.

Witch finger treat box

The boxes are pretty small.  You could fit tootsie rolls, smarties or any other small rolled candy in them. 

Werewolf finger treat box

The werewolf and mummy fingers are my favorite.

Mummy finger treat box

They would be good for a party since they go together so quickly.  You could make a lot in a short amount of time.  Plus I was able to fit four sets of fingers per color on one 12x12 sheet of paper.

Skeleton finger treat box

Thank you for stopping by.

Do what inspires you,
Cyndy G.

Friday, October 7, 2016

Frankinbear 3d SVG ~ with Cyndy G.

Good morning and happy Friday.  I hope all our friends in Florida are safe.  I have family that decided to ride out the storm, so we will be praying for her safety as this storm makes it's way up the coast.

Today I have I am sharing with you my Franken-bear.  I just love this guy!

Frankenstein Bear

I used the super cute bear from JGW 3D Teddy Bear.  I created his shirt and hair panels and if you send me an email (cynthia_gustashaw@ncsu.edu) I will send you the file for the them, the bear you can purchase at SVG Attic.

Frankenstein Bear

Other than the shirt and hair he is just the 3d Teddy Bear done in green.  My kids really like him too.  I hope you have enjoyed my Franken-bear today.  Have a crafty weekend!

Do what inspires you,
Cyndy G.

Friday, September 23, 2016

Skeleton in A Cage ~ with Cyndy G.

Happy Friday!  I am sharing some Halloween inspiration with you today.  I had a hard time trying to decide what to do for my project today so I went to the store and started browsing the Halloween section.  I saw a skeleton in a cage and thought "that is what I'm going to make!".  So here he is...

3d svg skeleton in a cage

He turned out pretty cute.  I used the Skeleton out of JGW Goul Tide Cheer and 
the cage is from Welcome Spring.

3d Svg skeleton in a cage

I used the skeleton at it's import size and enlarged the cage as big as I could make it go.  I put some shredded paper in the bottom of the cage to lift the skeleton up a little and tied a string to his hang loop and laced it through the top of the cage.

Thank you for stopping by today, I hope you will share with us your Halloween decorations made with SVG Attic files!

Do what inspires you,
Cyndy G.


Friday, September 9, 2016

Off With Her Head ~ with Cyndy G.

Happy Friday!  Today I am going to share with you a super fun project I created using several kits.  Halloween is right around the corner and as you know the Holidays sneak up on us and we don't get the crafting done we have planned, so this year, I'm trying harder to be on top of my Holidays!

Queen of Hearts crown, mask and shoe

I just love how everything turned out.  The paper is Graphic 45 - Halloween in Wonderland.

3d paper crown

This crown is from JGW Off to the Ball.  There is an additional piece to the band that I left off to make the crown small - so it is more like one the Queen of Hearts would wear.  I plan on attaching this to a headband so I can wear it. :)

3d svg Masquerade mask

This masquerade mask is from JGW Night Enchantments I have left off the stick for the mask because I don't want it to get bent before Halloween.  I plan on using the mask for Halloween as well.  The rose is in Be Mine and the feathers are from the Mourners Hat in the JGW Raven Quest.

3d masquerade mask

I cut the cards out of the paper.  I just adore this collection!

3d paper high heel shoe

The high heel shoe is from JGW Fashionably French.

3d paper shoe - back

I had so much fun putting all this together.  I hope you enjoyed it!  Happy Crafting!

Do what inspires you,
Cyndy G

New to SVG Attic?  Check out these awesome places!


Friday, August 12, 2016

Steampunk Dressform ~ with Cyndy G.

Good morning crafty people.  Today I'm sharing the Dressmaker Mannequin from JGW Just Sew.  I just love this new kit.  There are so many fun projects.

3d Steampunk dress-form

I added the Mourner's hat from JGW Raven Quest.

3d Steampunk dress-form

And wings from JGW 3D Witch.  I used Graphic 45, Steampunk Spells - I just love this paper!

3d dress-form

I'm using a piece of Trendy Twine as the necklace for my charm.  

This dress-form is so much fun and very sturdy!  I hope you will share your projects with us, we would love to see them.  Hope you all have a wonderfully crafty weekend :)

Do what inspires you,
Cyndy G.

Sunday, October 25, 2015

Monster Treats ~ with Cyndy G.

I wanted to pop by and share with you a very quick and cute project today.  If you find that you need a quick and easy bag for giving some treats for Halloween this might be the project you are looking for.

Monster treat bags

This cute little monster bag can be found in the JGW Monstrously Munchie Party kit.
I whipped up these little bags for my kids and niece's. 

Monster Treat Bag

I used some older paper I had from K & Company.  But don't you think these would look adorable in polka dots or stripes?  I enlarged this bag as big as it would go on my 12x12 mat.

Do what inspires you,
Cyndy G. 


Friday, October 9, 2015

Spooky Halloween ~ with Cyndy G

The count down is on, Halloween is three weeks away.  It always amazes me how time continues to speed up as you get older!  Halloween is definitely one of my favorite holidays.  I love all the different directions you can go with your decor; spooky and scary, or colorful and cute.  I choose the later for this project.  I decided to make the  Spooky Halloween Block Boxes from JGW Batwing Brew.

Spooky Halloween block set

I pulled out some of my old stash of paper and finally found a use for some 
We R Memory Keepers paper I have been holding on to.  


I love the way my witches broom from the JGW 3D Witch kit turned out.  
I used some crinkle ribbon from 3 Girl Jam, this is one of my favorite ribbons!

Witch hat

The witches hat is also from JGW 3D Witch kit.  This hat goes together so quickly.

Block letter "S"

I added a few dots, buttons and a bat brad for dimension. 

Halloween block

I also added a touch of Trendy Twine Grape Fizz.

Block letter "y"

I just love how everything came together.  I hope you have enjoyed my project today.  
I look forward to seeing all your Halloween projects!

Do what inspires you,
Cyndy G.

Friday, September 11, 2015

He's Alive ~ with Cyndy G.

"He's alive."  How many of you thought of Frankenstein when you read this line?  Well you will not be disappointed.  Today I am sharing my version of Frankenstein and his Bride.  They were so much fun to make.  I used JGW Sam the Scarecrow and Spooky Friends to create this wonderful couple.

Frankenstein and the Bride of Frankenstein

I am very pleased with how these two turned out.  I think they have the cutest faces.

Frankenstein, close up of face

Bride of Frankenstein, close up of face

I used a sticker to string between Frankenstein's arms.

Frankenstein

I also used a sticker for the Bride of Frankenstein's banner.

Bride of Frankenstein

I hope you have enjoyed my project today.  I had so much fun creating these two.

Do what inspires you,
Cyndy G.