Showing posts with label graphic 45. Show all posts

Friday, September 7, 2018

Steampunk Gears ~ with Cyndy G

Good morning.  Thank you for stopping by.  Today I am sharing a project using files from SVG Attic.  I used the gears from Steampunk Gears Cogs and Sprockets 3 as the base for my Steampunk Debutante wall hanging. 

Steampunk wallhanging


I added a solid background piece by breaking apart the main gear and removing all the extra pieces.  I cut three layers for the back for added stability. 

Steampunk wallhanging


Steampunk wallhanging


I fussy cut pieces from the Steampunk Debutante paper collection by Graphic 45 and added some metal embellishments.  I also used Mod Podge to protect and harden my finished project.  Thank you for stopping by today.


New to SVG Attic?  Check out these awesome places!


Do what inspires you,
Cyndy G

Monday, August 27, 2018

Sunflowers ~ with Cyndy G

Good morning, today I am sharing a project using files from My Scrap Chick.  I used the Sunflower 3D Rosette and leaves which can be found in the Sunflowers and Bumble Bees Bundle to make this project.  I found this cute little tin milk can on clearance at Hobby Lobby and immediately thought "This would be so cute with a sunflower in it."

3d Paper sunflower in tin milk can


I shrunk the size of the sunflower by about 45% since my can is only four inches tall.  I cut an image from Graphic 45 - French Country and glued it to the front and added a bow.  I think it is just adorable!

Paper sunflower

I don't know if you have ever used any of the rosettes from My Scrap Chick but they are Amazing!  Usually when I am making a rosette I am struggling to hold it together which I try to hot glue it and always burn my fingers.  The rosettes that My Scrap Chick makes have little thread holes at the bottom.  After you fold them and make your circle you thread string through the holes and gently tighten until your rosette is created, knot your string and you have a rosette.  No more burned fingers!  The only thing I would caution about is to make sure you don't use sewing thread, it would be too thin and would rip right through your holes.  I have found that twine works great.  Thank you for stopping by today.

Do what inspires you,
Cyndy G.


Friday, July 27, 2018

Christmas in July - Part II ~ with Cyndy G

Happy Friday crafters!  Today I am sharing a fun project using the Six Point Star Snowflake from the Winter Illuminations Kit.  I love this file.  I loved the snowflakes just as they are but I wanted to take them to the next level.

Six Pointed Star Snowflake Christmas decoration with ballerina in the center

I used Graphic 45 - Nutcracker Sweet and did a lot of fussy cutting.  The base of the snowflake has three layers, two cut out of patterned paper and one out of thin chipboard.  I used Mod Podge on each individual layer and added the dimensional diamonds to the center.  I used Mod Podge to glue all three layers together and let them dry overnight.  This made the ornament very sturdy.  


Six Pointed Star Snowflake Christmas decoration with Nutcracker and grandfather clock in the center

 While the base was drying I cut multiples of the same image and layered them with foam tape for dimension.  I inked all the edges and used Mod Podge on all the individual pieces.  While the pieces were still wet I molded them, adding waves in the banners, ripples in the ballerina skirts and molded the page cut out to make it look more like a book.  These were also left to dry overnight.

Six Pointed Star Snowflake Christmas decoration with Nutcracker in the center

The next day everything was ready to assemble.  This is one of my favorite paper collections and I am very please with how my ornaments turned out. 

Six Pointed Star Snowflake Christmas decoration with two ballerinas in the center

  Thank you for stopping by.

New to SVG Attic?  Check out these awesome places!


Do what inspires you,
Cyndy G

Thursday, July 26, 2018

Mermaid Wall Hanging ~ with Cyndy G

Hello today I am sharing a project I made using files from My Scrap Chick and Graphic 45 - Voyage Beneath the Sea paper collection.  I used the Anchor from the Anchor - 3 Designs file.  I made a blackout shadow of the anchor and then enlarged it to the size my cutting mat.

Anchor wall hanging with mermaid decoration

 I cut three layers of the shadow and used Mod Podge on each layer, then used Modge Podge to glue together to make them sturdy.  For the rope I used an orange piece of twine. 

Anchor wall hanging with mermaid decoration

I did a lot of fussy cutting and inked all the edges.  I added dimension to the mermaid by cutting multiple layers of the same image and using foam tape.

Anchor wall hanging with mermaid decoration

 I used foam tape to create layers in the coral as well.  This was such a fun project to put together.  
Thank you for stopping by - hope you have a wonderful weekend.

Do what inspires you,
Cyndy G


Thursday, July 12, 2018

Basketball Treats ~ with Cyndy G

Hello crafty friends thank you for stopping by.  I have a project from My Scrap Chick to share with you.  I combined the Tall Test Tube Holder and Basketball Allstars to make a fun treat for the boys basketball team.

Treat holder for test tubes decorated as a basketball court

I used the pieces for the court on the back of the test tube holder.

Treat holder for test tubes decorated as a basketball court

I had room on the front of the holder for the MVP title.

Treat holder for test tubes decorated as a basketball court

I used the bear and basketball as the tag.  You could customize these in the color of your favorite team.  They are very quick and easy to put together so you could recruit the help of your children and make them for the whole team.  Thank you for stopping by.

Do what inspires you,
Cyndy G

Friday, June 29, 2018

Specially For You ~ with Cyndy G.

Happy Friday today I am sharing a project from SVG Attic.  I made the tulips bouquet pop up card from the Tulips Festival Kit.  This is such a beautiful card!

Handmade card in soft pastels

I used Graphic 45 - Once Upon A Springtime paper.  I love the soft colors.  I changed the center of the card from the oval to the more decorative shape from the inside.  Since my papers are so similar in tone I inked all the edges to define the two different papers.

Pop up center in card with a flower bouquet

Since I am giving this card to my friend for her birthday - 
I stamped "Happy Birthday" using my Graphic 45 - Time To Flourish stamp set.

Pop up center in card with a flower bouquet

I just love how the flowers turned out.  I used a coral and then a pink ink around the edges of the flowers.  I also inked the basket in brown.  When making this card make sure to take extra care when gluing the inside panel.  It is important that the seams line up exactly.

Thank you for stopping by.

New to SVG Attic?  Check out these awesome places!


Do what inspires you,
Cyndy G

Friday, June 15, 2018

Duck and Duckling Father's Day Card ~ with Cyndy G.

Good morning.  I can't believe how fast this year is flying by.  Sunday is Father's day and if you are looking for a quick card to make with the kids I've got the perfect project for you.  This project was made using files from My Scrap Chick.  I used the Box in a Card - Square, Duck and Duckling Silhouettes and Duck and Cattails Silhouettes.

Duck and duckling with cattails

The paper is Graphic 45, Good Ole Sport.  This file is easy enough for your children to put together and they will be so proud of the what they were able to make.  

Duck and duckling with cattails

My kids love making box cards.  They have a great WOW factor.  
This looks so masculine and the duckling makes it perfect for Father's Day.

Thank you for stopping by.

Do what inspires you,
Cyndy G

Fairy Dust Lantern ~ with Cyndy G

Good morning and happy Friday.  Today I am sharing a project from SVG Attic.  I created a fairy house using the 3d Hanging Lantern and Graphic 45 - Fairy Dust.

Paper lantern with fairies inside sitting on flowers

I love the way the lantern went together.  Everything fits together very tightly especially the top.  Take your time and work the top piece in carefully or you will crush it.  The lantern is small, only 3x3 square and about 7.5 inches tall including the ring on top. I changed the window cutouts so you could see the inside of the lantern better.  I used the Circle grille on all four panel windows and cut out the center to open it up.

Paper lantern with fairies inside sitting on flowers

I used small paper roses, daisy and mushrooms in the center to place my fairy on.  I inserted the wires from the flowers through the tiny hole in the center of the bottom piece and twisted them together underneath.  Then I built up some mushrooms I had cut out of the Fairy Dust paper using foam tape and glued them behind the center cluster of flowers and mushrooms.

Paper lantern with fairies inside sitting on flowers

Thank you for stopping by.

New to SVG Attic?  Check out these awesome places!


Do what inspires you,
Cyndy G

Friday, June 1, 2018

Farm Fresh ~ with Cyndy G

Good morning.  Today I am sharing a project from SVG Attic.  I used the 3D Garden Spade and made home decor piece.


I fussy cut vegetables out of Graphic 45 Home Sweet Home Collection and added them to the garden spade.  I also used a title from Authenique Paper Homestead Collection.


I used Mod Podge on each individual piece to help protect the paper from tearing and inked all the edges.  Then I used foam tape to add dimension between the vegetables.  The finished project can be hung by the hole in the handle or displayed on an easel.  Thank you for stopping by today.


Do what inspires you,
Cyndy G


Saturday, May 26, 2018

Mother Goose ~ with Cyndy G

Good morning.  Today I am sharing a project from My Scrap Chick.  I used the Pop Up Frames: Classic Tall to make some cute home decor pieces.  They even come with a stand so you use them on a dresser or shelf.

I used Graphic 45 - Mother Goose.  My local Tuesday Morning had this paper on sale and I bought all that they had.  I used the Story time cards to make my pictures.


I only used three layers of the frame and I fussy cut my images and used foam tape to give them a 3d effect.  I love this type of crafting.  I remember when I was young my Mom would take us out to look at the outdated calendars and let us pick the one we liked and we would make these pictures.  Such fond memories!


These would look so cute in a baby's nursery.


Thank you for stopping by.

Do what inspires you,
Cyndy G.

Friday, May 18, 2018

By the Sea ~ with Cyndy G

Happy Friday.  Today I am sharing a project using files from SVG Attic's - JGW Fathoms Deep.  I used the top piece of the Claim Shell Box.  I got the idea from Annes Paper Creations.

First I cut the base of the shell three times - once out of Chip board and twice out of Vanill Cardstock to cover the front and back of the chipboard.  Next I cut the panels out of decorative paper.  I used Graphic 45 - By The Sea.  I raised every other section of the shell by using strips of foam tape under the panels to give the shell the feeling of ripples that you find on a real claim shell.


I did a lot of fussy cutting and used Mod Podge on all the pieces before assembling the project.  This helps protect your fussy cut pieces from tears and it really makes the base solid.  Finally I added a self adhesive picture hook to the back so it can be hung.  The overall size of the project is about 5x7.  
Thank you for stopping by.

New to SVG Attic?  Check out these awesome places!


Do what inspires you,
Cyndy G


Friday, May 4, 2018

Alice Pocket Watch ~ with Cyndy G

Hello today I am sharing a project I made using files from SVG Attic/Snapdragon Snippets.  I used the Pocket Watch Face as the base of my project.  I out the pocket watch four times - two in chipboard and two with patterned paper.


The paper is Graphic 45 - Halloween in Wonderland.  I love this paper and decided to do a dimensional wall hanging using it and the pocket watch.  I did a lot of fussy cutting for this project.  I used foam tape to give it extra dimension.


I finished off my project with Mod Podge.  This will help protect the paper and add strength to the overall project.  Thank you for stopping by.

New to SVG Attic?  Check out these awesome places!


Do what inspires you,
Cyndy G

Monday, April 2, 2018

Catch the Wind ~ with Cyndy G

Hello, today I am sharing a project with designs from SVG Attic/Snapdragon Snippets the Windmill 3D Model.  I used the beautiful Graphic 45 - Fairy Dust.  I think it fit this project perfectly.

3D paper windmill

I reduced the size of this file.  The overall height of my windmill is about eight inches.

3D paper windmill

I enjoyed taking the pictures for this project.  The flowers were in bloom and it was a beautiful day.

3D paper windmill

The paddles even spin - it is a wonderful design.  This is a more advanced file but like most of Jodi's designs I put together all the individual pieces and then assemble it.  It is definitely worth the time to put together - it is such a beautiful project.  Thank you for stopping by.

New to SVG Attic?  Check out these awesome places!


Do what inspires you,
Cyndy G

Friday, March 23, 2018

Gift Box ~ with Cyndy G.

Hello, today I am sharing a pretty box from SVG Attic/Snapdragon.  It is the Tall Box with Lid.  This is a very nice size and it is easy to put together.  It makes a perfect gift box.  You could decorate it for an occasion.  I have used Graphic 45 - Time to Celebrate because I am going to use mine for a birthday.

Tall gift box

I used some crinkle ribbon around the box and a button as the accent on top.  You could also use a large bead or a draw pull.  I just love this ribbon!

tall gift box

The box stands just over 9" tall and is 4" square.  Thank you for stopping by.

New to SVG Attic?  Check out these awesome places!


Do what inspires you,
Cyndy G


Friday, March 9, 2018

Masquerade Box ~ with Cyndy G

Hello today I am sharing with you a beautiful box I made using files from SVG Attic/Snapdragon Snippets.  I used Hex Box with Lid and Masquerade Decorated 3d Mask.  I just love how it turned out.

Hexagon box with 3d masquerade mask on top

I used Graphic 45 Midnight Masquerade Collection.  The colors are so rich and vibrant.
I shrunk the size of the mask so that it would fit on the top of the box.

Hexagon box with 3d masquerade mask on top - open

I added jewels and pearls to the mask and some crystal ribbon around the top of the lid. 

Close up of mask

Thank you for stopping by.

New to SVG Attic?  Check out these awesome places!


Do what inspires you,
Cyndy G

Friday, February 23, 2018

Lemonades ~ with Cyndy G

Hello, today I am sharing a project using files from Snapdragon Snippets.  Box 3d Window Icing Accents.  This is a very simple little box that is perfect for some cookies or some other small trinket.  I sized mine just a little smaller so that I could cut it out of one sheet of paper.

Small box

I used Graphic 45 Cafe Parisian for this project.  The chipboard cut out fit the lid perfectly.
I tied it off with a piece of crinkle ribbon from my stash.

Small box with lemon cookies on a plate

The whole thing makes a sweet little gift to let someone know you are thinking about them.

Wondering what kind of cookies these are?  They are Girl Scout Cookies - Lemonades.  If you haven't gotten your cookies yet but you would love to have some shipped to your door - you can order from this link until the end of March.  

Thank you for stopping by.

New to SVG Attic?  Check out these awesome places!


Do what inspires you,
Cyndy G

Friday, December 1, 2017

Three Wise Men ~ with Cyndy G

Hello today I am sharing a project I made using files from SVG Attic.  I made the Three Wise Men cracker boxes that can be found in the JGW Gifts for the King kit.  These went together very quickly and I think they look wonderful.  I like the way they fit in the tray that is included in the file.

Wise men cracker boxes

I love the rich look of the paper.  It is Graphic 45 - Midnight Masquerade.

Wise man cracker box - orangeWise man cracker box - purple

I also added some Self-Adhesive Pearl Jewels from Oriental Trading.  This would be a good project to do with the kids.  I think I am going to use mine as teacher gifts.

Wise man cracker box - Green

Thank you for stopping by.

New to SVG Attic?  Check out these awesome places!


Do what inspires you,
Cyndy G.

Friday, November 3, 2017

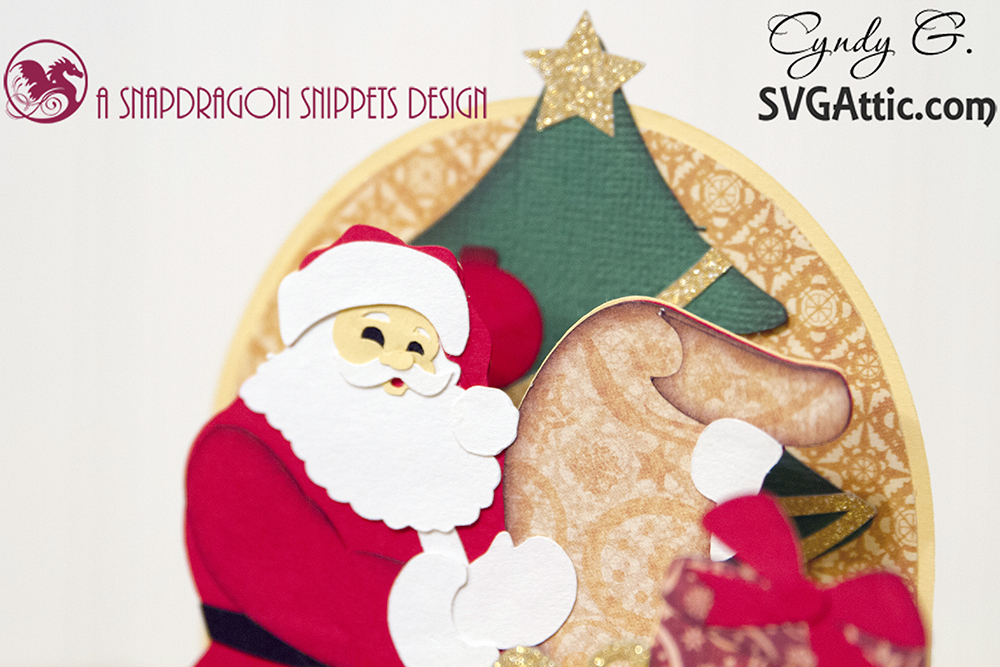
Santa's List ~ with Cyndy G.

Hello crafty friends.  I hope everyone had a fun and safe Halloween.  I know my kids really enjoyed the night!

My children in costumes

Today I am sharing a card from SVG Attic. I made using the CG Father Christmas kit.  The Santa's List Box Card.  This is one of my favorite cards.  I have to warn you that there is a lot of paper piecing to do with this card but I think it is worth the time!

Santa box card

I used Graphic 45 - Father Christmas paper.

Santa box card

I also inked a lot of the edges to add more depth to the card.


Thank you for stopping by.

New to SVG Attic?  Check out these awesome places!


Do what inspires you,
Cyndy G.

Friday, August 25, 2017

Witchie Woman ~ with Cyndy G

Hello crafty friends.  Today I am sharing a project from SVG Attic - JGW 3D Witch.  This project takes a some time a patience to put together but the finished project is well worth the effort!


Isn't she adorable.  Her skirt panels are stitched together with some embroidery floss.  The paper is some K&Company that I had and the accent panels are Graphic 45, Halloween in Wonderland.


Her hair is made out of Trendy Twine - Limeade.  I made her hair according to the directions except I used Mod Podge instead of starch and I loosened the curls.  To make her bangs I ran three strands of twine across the front of the hat.  I glued the hair around the inside edge of the hat rather than her head then attached the hat.  


I added a bat to the center of her bow.  I also decided to not add the wings to my witch.  

Thank you for stopping by.

New to SVG Attic?  Check out these awesome places!


Do what inspires you,
Cyndy G.