Showing posts with label centerpiece. Show all posts

Friday, November 2, 2018

Pilgrim Hat Centerpiece ~ with Cyndy G

Hello, today I'm bringing you a project from SVG Attic.  I made the Pilgrim Hat from SDS Pilgrims Prayer.  I think this is going to make a beautiful centerpiece on my Thanksgiving table.  The hat is so easy to put together and it comes with all the embellishments you need.  I did add a burlap flower to my hat.

Pilgrim Hat with wheat and flower embellishments


Close up of wheat and flower embellishments

There are so many possibilities with this hat.  Make it as fancy or plain as you like.  Do you have a child doing a Thanksgiving play and need to make a hat, this would be perfect.  Thank you for stopping by today.

New to SVG Attic?  Check out these awesome places!


Do what inspires you,
Cyndy G

Sunday, November 2, 2014

Casino Night - Volunteer

My boys attend Saint Michaels Catholic School.  This year we have a new principal and she wants to do a casino night for a fundraiser.  So I volunteered to be on the decorating committee and thought my craft might come in handy.

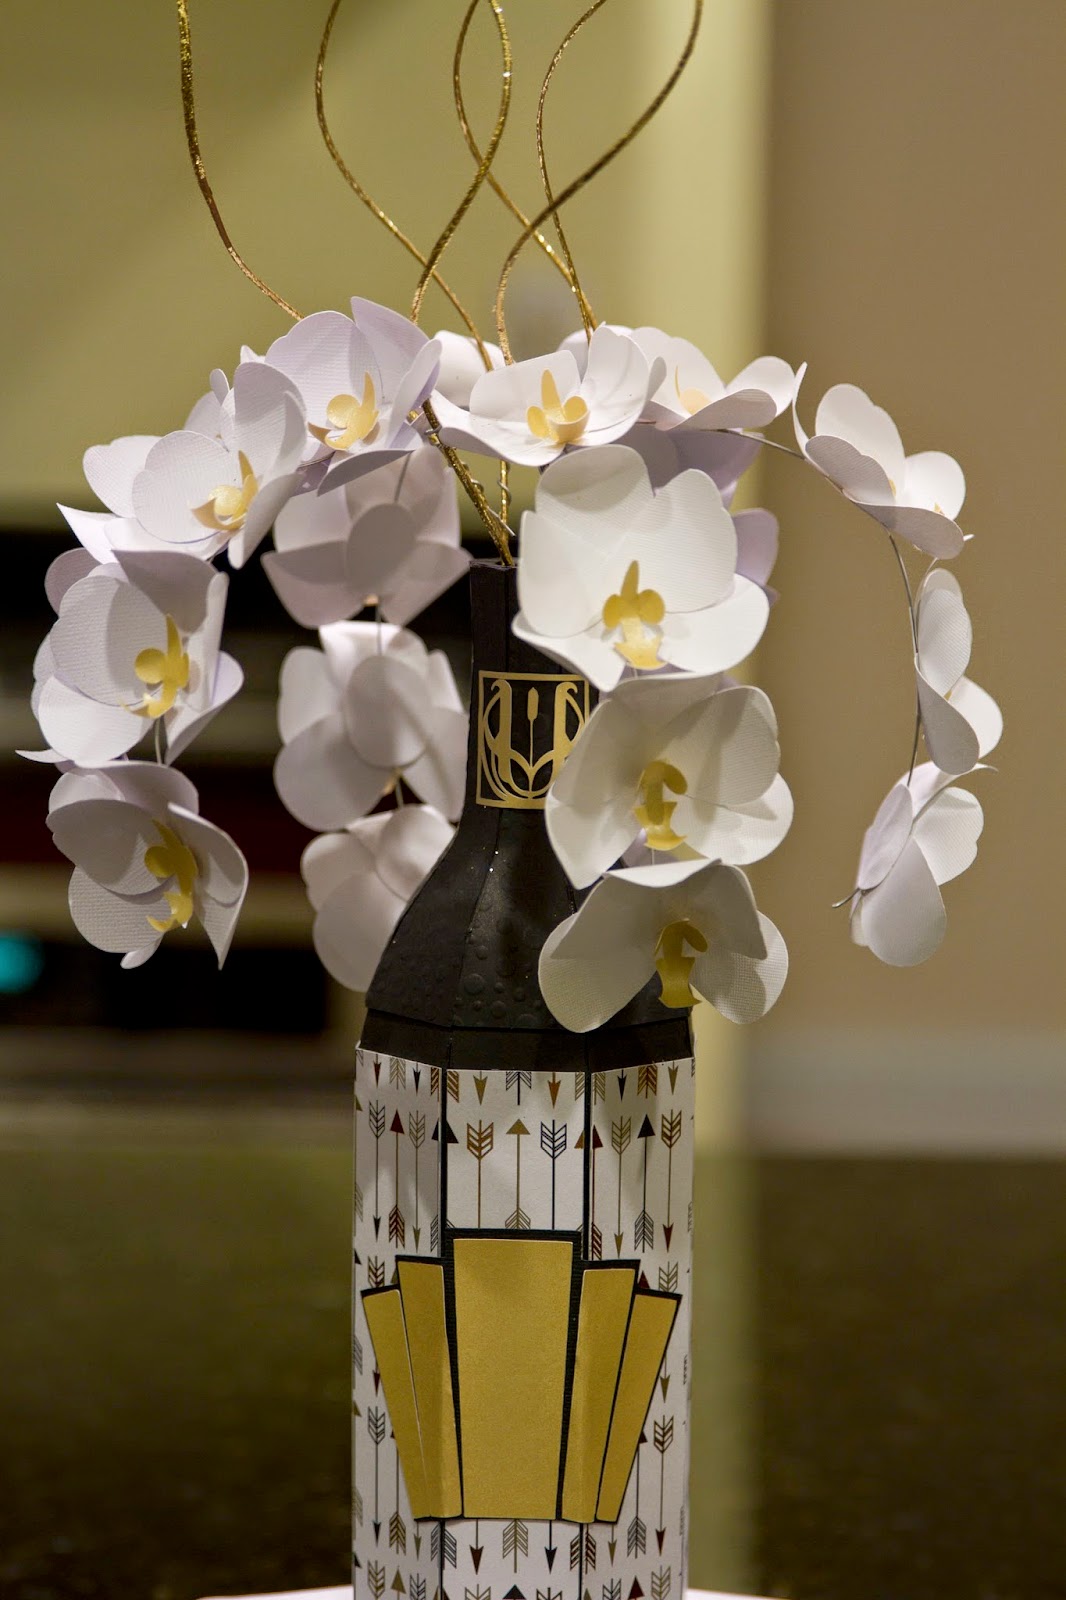
So I turned to SVG Cuts for the Champagne bottle and dice; and Craftsuprint for the orchid.  I found these nice gold painted branches at Hobby Lobby.  Here is what I put together:

paper champagne bottle with orchids casading out of the top standing on top of large dice

I found some art deco designs to add to the bottle to give it a little more design.

How did I do it?  I attached the flowers to floral wire (silver) with a hot glue gun and attached a little circle on the back to hid the glue a wire on each flower.  Then I attached the wire to the branch by twisting it on about an inch above the top of the bottle and curved it give it the feel of a fountain.  It didn't take much wire to attach to the branch, I left about two inches.

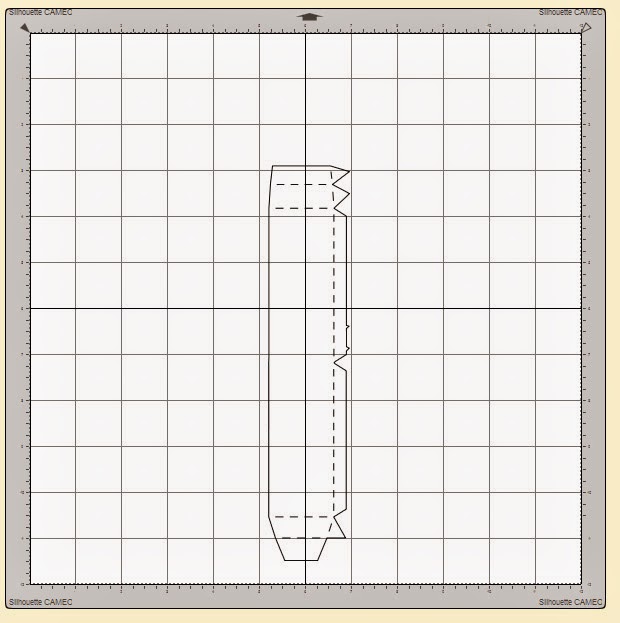
I also made the bottle a little taller.  I doubled the size by using the union tool on two of the pieces.  To do this I clear my mat of all pieces except what I am working on.  When I need to have things lined up exactly I copy and paste in place.  I decided to line my pieces up by the fold lines at the bottom and top of two pieces  -  see picture:


If you use the merge tool and you want your fold lines you have to break apart you pieces but first you need to delete the extra fold lines that you don't need.  To do this break part one of your pieces (leave the other one grouped).  Then select the parts you need to delete  -  see photo below:


Then repeat with the other piece.  What you have should look like this:


Leave your pieces ungrouped and broken apart and select both outer pieces without selecting the fold lines.  To do this click on one hold the shift key and then click on the other.  Go to path and then union.  Like this:


This should be what your new piece looks like:


Since all the pieces to the bottom of the bottle are the same you can just copy this one piece for all eight pieces you need.  Now you have a bottle that will be 4" taller and you haven't distorted the bottle by stretching it or made it any bigger round.

Here are some more pictures of the finished project:

paper champagne bottle with orchids casading out of the top standing on top of large dice

close up of orchids in champagne bottle

I still need to find some gold tape to cover the wire from the flowers, but other than that I think this is finished!

Here is a list of the kits and links to them:

New Year's Eve Kit
The Green Room Kit
Orchid Plant

I used The Paper Studio - Oh So Glam - paper stack

Friday, October 31, 2014

Witches in the Pumpkin Patch

Immediately, following the end of the Autumn challenge SVG Cuts announced a Halloween challenge.  They had mentioned earlier that they might do one so I had already made a pumpkin in preparation however I had to wait to hear what kits were going to be allowed before proceeding any further than that.

I used Graphic 45 Steampunk Spells.  I just love this collection.  I wanted to carry the theme of the paper in the pumpkin up into the top decoration.

Spooky scene with pumpkin next to headstone

In order to do this I made a bed of flowers as my base.  I have the witch on patrol for the night around her house.  The Big Jack-o-Lantern is from Fright Night, the House, Jack-o-lantern (little) and flowers are from the Haunted Forest kit.  The rosette spiderweb is in the Catacomb Manor kit, the moon is a free file and the spider is from the Spooky Soiree kit.

The house and the jack-o-lantern are scaled down to 35%.  The house is 4 and a half inches tall.

Close up of pumpkin, witches house and spiderweb

I just love the way it all turned out.

Close up of witch house and pumpkin

I think the moon added just the right touch.

SClose up of top of pumpkin showing scene of a small pumpkin, witch house, spiderweb and flowers

I glued a square piece of Styrofoam to the inside of the pumpkin and added floral wire to all the pieces (you can see it a little behind the web, from the moon), and arranged the pieces in the pumpkin.  My biggest obstacle was coming up with something to attach the wire to for the house.  So, I made a trip to Michael's.  The young lady who works there suggested using a button.  What a wonderful idea.  So I wrapped the wire around the button and then hot glued it to the bottom of the house.  This way I can still take it all apart and store it easily.

Another close up of the top of the pumpkin

I hope you enjoyed my Steampunk inspired pumpkin.  Happy Halloween.

Here is a list of the files I used:

Fright Night
Haunted Forest
Catacomb Manor
Spooky Soiree
Free Vintage Witch


Do what inspires you,

Cyndy G

Wednesday, August 20, 2014

Carousel Ride

Whew, what a week so far.  My husband and I took some well deserved time to ourselves for the past few days (thank you Mom), only to return home in time to send the kids to school for their first day of school!  We went to one of our favorite places, Charleston.  I hope I will have time to post some of my pictures tomorrow.

I also returned in time for the release of svgcuts newest kit Carousel Ride.  I have been trying to create a carousel myself for some time now.  Thank you Mary for finishing the job for me!  I have to admit, yours worked out much better than mine.  The file is actually made as a cupcake holder.  I changed mine to be just a carousel, I didn't have time to bake today.

This file really tested me.  The top was a little tricky.  I love the way it turned out, here are some pictures:

3d paper carousel

For the placement of the poles I added a small circle (.108) in center of each circle meant for the cupcakes.  This then allowed me to keep the horses space equally.  I also added the holes to the top liner so the poles would be straight.  To do this I centered the bottom piece (grouped) on the mat, ungrouped the bottom pieces, grouped all the small holes together, copied and pasted in place, with the small circles still selected hold down the shift key and select the bottom liner and group together, move this piece off the mat.  You should still have the small circles centered on the mat.  Next, center the top piece, select all the small circles and top piece and group together.  Now the top should line up with the bottom and you will have guidance for placing the poles.

3d paper carousel

3d paper carousel ride

To hold the poles in place I filled the little holes with glue then stuck the poles on.  You have to make sure to let them dry completely or they will move.

3d paper carousel ride

Tuesday, August 5, 2014

Bedtime Stories SVG Kit

Bedtime Stories SVG Kit is still a favorite of mine.  I love the nursery rhyme projects in this kit.  So, when my sister asked me if I could make some favor boxed for her nurses baby shower, I knew I wanted to used the castle somehow.  I remember my mom saying "That does look very babyish" when I showed her the picture.  Then Brigit posted her project,  Humpty Dumpty Treat Holder, and my project was born.

I used the following kits to create my center piece and treat boxes:

Bedtime Stories
Moonlight Garden Party
Camp S'mores
Cuddly Storybook Friends SVG Collection


Mother goose themed baby shower

Humpty Dumpty sitting on the wall of a castle gift box

close up of Ole King Cole

Humpty Dumpty treat boxes

Castle gift box